Subsections of Guidelines
First Day
Welcome to Bosphorus ISS.
If you are asking yourself “What should I do on my First Day ?”, you came to the right place.
First of all, if you are reading this page, you are most probably our new teammate who tries to get used to this amazing environment.
Do not forget, BISS Family is also very much excited with your arrival and congratulates you sincerely. We hope that the recruitment process will go smoothly for you too, as it did with the previous candidates.
We have prepared a guideline for our new teammates to catch up with us.
- Take a cup of coffee and some snacks from kitchen (It is mandatory). You can easily learn how to use the Coffee Machine or get help from somebody to learn what choices it offers.
- Don’t worry, the guideline doesn’t take much time and it is designed to be clear and easy to follow. If you encounter a problem, do not hesitate to consult with one of your colleagues.
- All the other stuff and paperwork related to your contract will be delivered to you in a couple of days.
This content is exclusive for BISS Colleagues!
- For more detailed information please follow this link: First Day 101
Hardware Setup
Subsections of Hardware Setup
Notebook Setup
There are two type of installation as listed below.
- Windows installation
- FreeDos Installation
Windows installation
- Ask for the bootable disk from friends in the office
- Plug it in to your computer
- Restart your Windows and press F12 button during the boot
- Format the computer with this usb-drive
FreeDos Installation
DELL XPS-15 9570 First Use Setup
This guide/document is specific for DELL XPS-15 9570 notebook.
After you get an USB drive with our current system image, please follow the steps.
-
Power on the notebook using the power button. Wait until DELL logo appears. After logo appeared, press and hold power button to power off the notebook.
-
Power on the notebook using power button and press
F12repeatedly to go into the boot menu. -
Select
UEFI: TOSHIBA TransMemory 1.00, Partition 1. -
Use command,
diskpartand press enter to start Microsoft DiskPart.
-
You can see connected disks by using command
list diskChoose the main disk. In this guide It would be disk 0, so use command
sel disk 0and press enter to select the disk.
-
You can see volumes of the selected disk by using command
list volChoose the OS volume. In this guide It would be volume 0, so use command
sel vol 0and press enter to select the volume.
-
Format the disk by using the command.
format fs=ntfs quick OVERRIDE label=OS -
Leave DiskPart by using the command.
exit -
Cloning image to a local drive has two methods as mentioned below.
a) Apply the cloned image from disk D (where the clone image exists) to disk C (or where you will install the OS to) by using the command.
dism /apply-image /imagefile:E:\BISS.wim /index:1 /applydir:C:\b) Apply the cloned image from a network location to disk C(or where you will install OS to) by using the commands listed below.
- Use this command to connect to remote server.
net use Z: \\the_ip_where_the_wim_server_exist_on\BISS /user:BISS password- Use this command to clone the image to desired location.
dism /apply-image /iamgefile:Z:\Images\biss.wim /index:1 /applydir:C:\ -
After process complete, restart the computer with installed software by using the command,
exitand wait until mouse pointer to disappear. Then unplug the USB flash drives.
-
Your computer needs some driver installations. You can install them from Windows Update. While updating, you will need to restart the Windows at some points to continue installing other updates. For an healthy system setup, installing all provided updates is preferred.
Changing Computer Name
- Go to “Control Panel\System and Security\System”
- Under the heading “Computer name, domain, and workgroup settings” click “Change settings” on the right. The System Properties window will open with the “Computer Name” tab selected.
- Here click the “Change” button next to “To rename this computer or change its domain or workgroup”.
- Then fill the “Computer Name” with your name and surname like “NAME-SURNAME”.
- Press “OK”.
- You have to restart this PC to apply this changes.
Printer Setup
brother LC3719XL
-
Download official driver.
- Version: Y16B_C1_ULWT_PP
-
Start installation and follow those steps
- Select Language

- Choice Wi-Fi
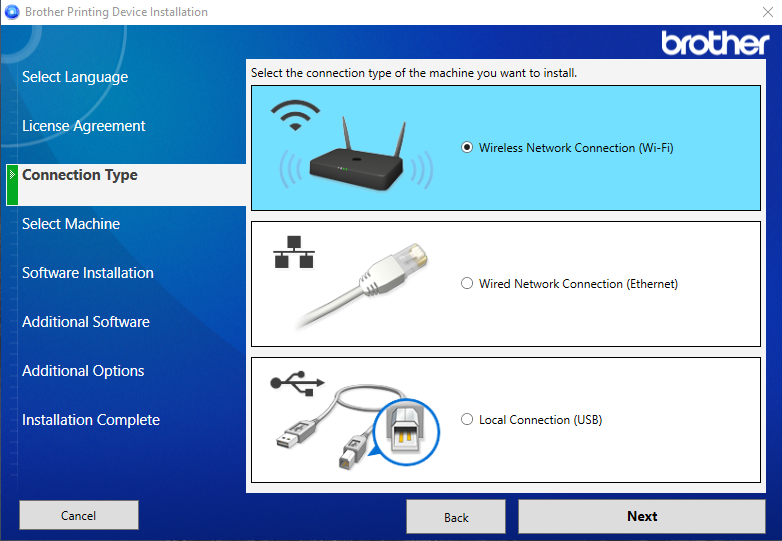
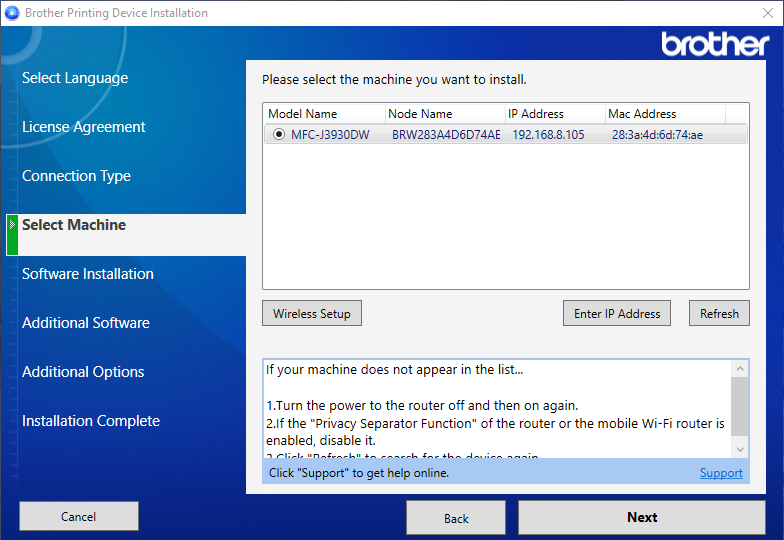
- It will scan your network and show available printers then you need to select your printer
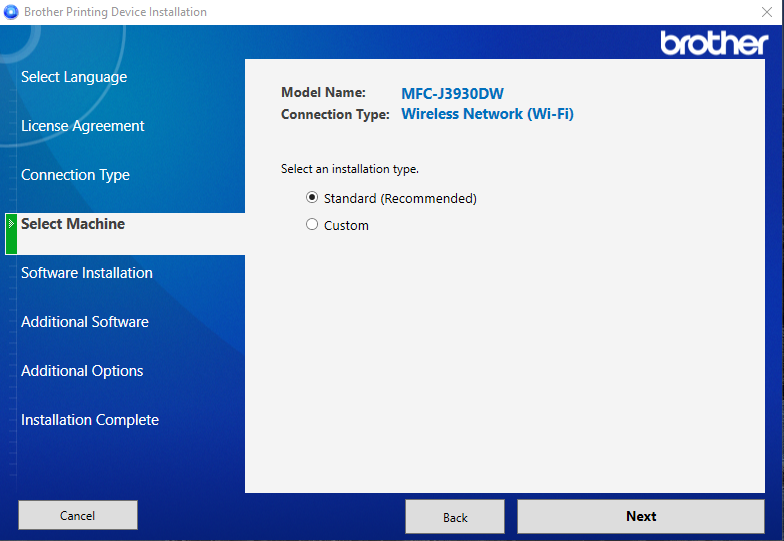
- Continue with standard configurations
- Install required packages

- Uncheck the support program approval
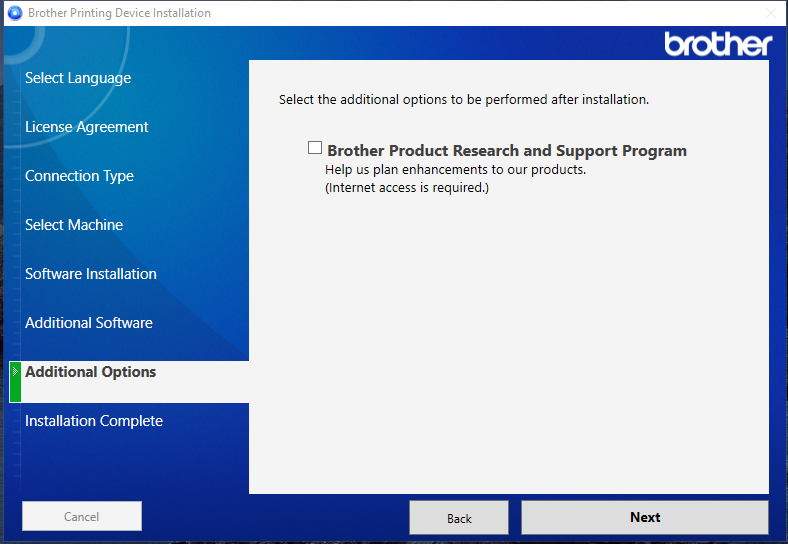
- Select Language
-
Installation finished. You’re ready to use printer over Wi-Fi.
Warming Up
Before we go further, please be sure that following list is completed:
- You tasted our coffee!
- You have met at least three people in the office (no, your interviewers does not count).
- Your PC is ready and succesfully connected to the office wifi.
- Your bosphorusiss account is ready and you have access to Google workspace.
- You learned how to lock your laptop your laptop (⊞Win + L) and you lock each time you leave your table.
Voilà! You seem more than ready, now we can start.
BISS Retro Guide
These gatherings are all about one big question: “How can we be even happier working here at BISS?” We believe that by openly sharing our thoughts and ideas, we can make our company an even more awesome place to be.
To make sure we get the most out of our time together, here’s a little guide:
Getting Ready to Share We love for you to come prepared with your thoughts on the following:
Start Doing: What’s something new you think we should begin doing at BISS? Maybe it’s a new process, a different way of collaborating, or a fun team activity.
Stop Doing: Is there anything we’re currently doing that you think we should stop? This could be something that’s not working, causing bottlenecks, or just isn’t effective anymore.
Do More: What are we already doing really well that you think we should keep doing or even expand upon? We love to celebrate our successes and make sure we continue to build on them!
How We Run the Meeting To keep things smooth and ensure everyone gets a chance to speak, we have a few guidelines:
Time to Shine: Everyone has about two minutes to share their ideas. If a discussion around a suggestion starts to get lengthy, our facilitator gently steps in and moves the topic to the “Discussion” section at the end of the meeting, where we can dive into it more deeply.
One Voice at a Time: Whether you’re in the office or joining online, we take turns speaking. Our facilitator (the person who guides our discussion and keeps us on track) helps manage the speaking order to make sure everyone’s voice is heard clearly.
Respect is Key: This is a safe space for all ideas! We have zero tolerance for interrupting, aggressive comments, shouting, or any behavior that isn’t respectful. It’s essential that we share our thoughts constructively and maintain a peaceful discussion environment.
What We Don’t Cover: Please keep in mind that topics like salaries, benefits, and legal or financial processes aren’t part of our retro discussions. You can always talk about these with the relevant departments, like HR or your team leads.
Keep an Eye on Our Progress! Remember those awesome ideas you’ve shared in past retros? You can see how they’re progressing and turning into action items on our dedicated board:
Checking in on this board helps us all see the real impact of our discussions!
Meeting Flow:
First Session: Following Up on Previous Retros. We start by checking in on the items from our last retro, tracking their progress directly on our Azure board.
Second Session: Sharing New Ideas. We go through a randomly generated list of our company members, taking turns to present new suggestions. Everyone has about two minutes to share their ideas.
Third Session: Discussion. If a discussion around a suggestion from the second session starts to get lengthy and we don’t reach a conclusion, we move the topic here. This is where we dive deeper and work towards solutions.
Location: BISS Levent Office (Upper Floor) & Google Meet
A Little Heads-Up: Your participation in these retro meetings is super important! Attendance is mandatory for everyone. If you’re working outside of Istanbul, feel free to join us via Google Meet. For those in Istanbul, we love to see you in the office for these meetings, unless there’s a special circumstance. If you absolutely cannot make it, please ensure you discuss this with your team lead and receive their approval beforehand.
Looking forward to making BISS an even better place, together!
Smart Door App
How to acquire Smart Door Application?
- If you are an IOS user, reach to IT team via it@bosphorusiss.com
- If you are an Android user download the APK by using Google Shared
Drive. Path for directory that contains APKs is:
\Shared drives\Bosphorus Industrial Software Solutions\Internal_Projects\Smart_Door_Lock\Android Mobile Apps
Home Office
Home Office
As a company that adopted Home Office right even before the Covid-19 pandemic started, BISS believes in the motto of "Work where you are happy at!".
Requirements for Home Office
- Completion of the probation period (2 months) for new joiners
- If your project is suitable for remote working
- You are not connected to a physical device -don’t worry, BISS VPN saves the day for such situations most of the time-
- Approval of your project teammates
- Having a registered and approved home address on BISS ERP (the address where you will make your home office)
If you meet the above requirements, there are no obstacles to creating a home office form.
PS: It is not a requirement, but we recommend that you do not go through a process that requires pair programming. Because pair-programming sessions are much more efficient when they are side by side in the office :)
About the Home Office Form
The home office form is a form where you let your teammates know where you will be working on the next working day. It should only be sent between 06:00 and 16:00 on the working day when you are going to make a home office.
- A home office form can always be created on the current working day for the next working day.
- Example: A home office form can be sent for Monday(May 23), between 06:00 and 16:00 on Friday (May 20).
- Example: A home office form can be sent for Friday, May 20 between 06:00 and 16:00 on Wednesday, May 18 (as Thursday, May 19, is a public holiday)
- Example: Let’s assume that Monday(July 4), Tuesday(July 5) and Wednesday(July 6) are public holidays, in this case, in order to create a home office form for Thursday(July 7), You need to create the home office form on the previous working day, which is Friday, July 1st between 06:00 to 16:00.
- Example: To create a home office form for Wednesday (August 3), it is sufficient to create a home office form on Tuesday, August 2, between 06:00 and 16:00. (Assuming August 2-3 is Tuesday and Wednesday and not holidays but PTOs of the employee.)
Creating a Home Office Form
- You must have a registered/confirmed home address on BISS ERP. (Can be added with
My Account/My Addresses/Add) - Click the
My Home Office Formbutton on the Home Office page between 06:00 and 15:00 on the working day before the day you work from home, select your approved address to make your home office and click the create button. That is all!
Home Office Rules
- BISS expects you to be reachable by your team between 10:00 and 16:00, you can use flexible working hours for all remaining hours. In summary, as BISS, we are not interested in what time zone you work outside of core working hours.
- Do not forget that if you need to leave your registered address for a while during working hours, you must inform your teammates and BISS.
PS: Since you are not in the office, don’t forget to catch up with all the jokes made on the Google Chat channel called Why So Serious? :)
Do not hesitate to contact us for any question!
General Process and Office Rules
This content is exclusive for BISS Colleagues!
- For more detailed information please follow this link: Process and Office Rules