Subsections of Hardware Setup
Notebook Setup
There are two type of installation as listed below.
- Windows installation
- FreeDos Installation
Windows installation
- Ask for the bootable disk from friends in the office
- Plug it in to your computer
- Restart your Windows and press F12 button during the boot
- Format the computer with this usb-drive
FreeDos Installation
DELL XPS-15 9570 First Use Setup
This guide/document is specific for DELL XPS-15 9570 notebook.
After you get an USB drive with our current system image, please follow the steps.
-
Power on the notebook using the power button. Wait until DELL logo appears. After logo appeared, press and hold power button to power off the notebook.
-
Power on the notebook using power button and press
F12repeatedly to go into the boot menu. -
Select
UEFI: TOSHIBA TransMemory 1.00, Partition 1. -
Use command,
diskpartand press enter to start Microsoft DiskPart.
-
You can see connected disks by using command
list diskChoose the main disk. In this guide It would be disk 0, so use command
sel disk 0and press enter to select the disk.
-
You can see volumes of the selected disk by using command
list volChoose the OS volume. In this guide It would be volume 0, so use command
sel vol 0and press enter to select the volume.
-
Format the disk by using the command.
format fs=ntfs quick OVERRIDE label=OS -
Leave DiskPart by using the command.
exit -
Cloning image to a local drive has two methods as mentioned below.
a) Apply the cloned image from disk D (where the clone image exists) to disk C (or where you will install the OS to) by using the command.
dism /apply-image /imagefile:E:\BISS.wim /index:1 /applydir:C:\b) Apply the cloned image from a network location to disk C(or where you will install OS to) by using the commands listed below.
- Use this command to connect to remote server.
net use Z: \\the_ip_where_the_wim_server_exist_on\BISS /user:BISS password- Use this command to clone the image to desired location.
dism /apply-image /iamgefile:Z:\Images\biss.wim /index:1 /applydir:C:\ -
After process complete, restart the computer with installed software by using the command,
exitand wait until mouse pointer to disappear. Then unplug the USB flash drives.
-
Your computer needs some driver installations. You can install them from Windows Update. While updating, you will need to restart the Windows at some points to continue installing other updates. For an healthy system setup, installing all provided updates is preferred.
Changing Computer Name
- Go to “Control Panel\System and Security\System”
- Under the heading “Computer name, domain, and workgroup settings” click “Change settings” on the right. The System Properties window will open with the “Computer Name” tab selected.
- Here click the “Change” button next to “To rename this computer or change its domain or workgroup”.
- Then fill the “Computer Name” with your name and surname like “NAME-SURNAME”.
- Press “OK”.
- You have to restart this PC to apply this changes.
Printer Setup
brother LC3719XL
-
Download official driver.
- Version: Y16B_C1_ULWT_PP
-
Start installation and follow those steps
- Select Language

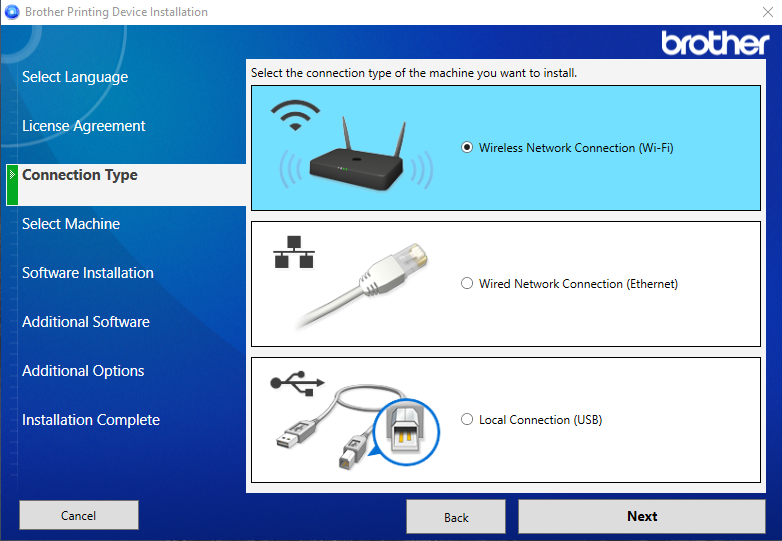
- Choice Wi-Fi

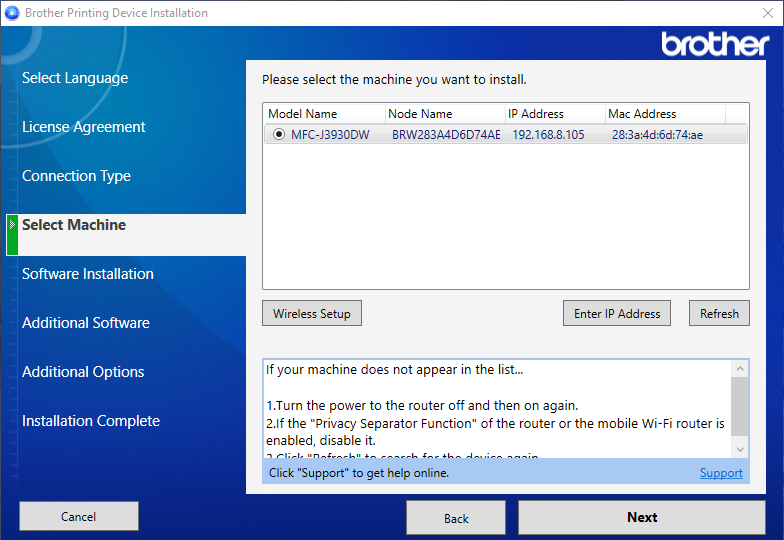
- It will scan your network and show available printers then you need to select your printer

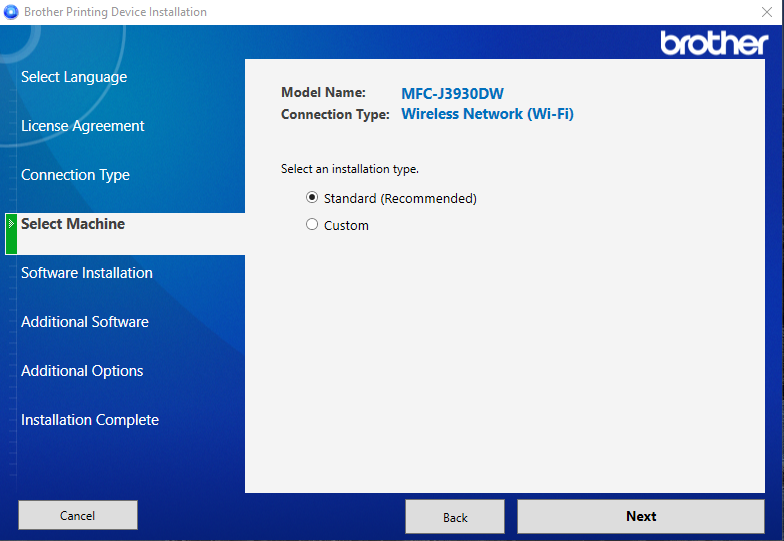
- Continue with standard configurations

- Install required packages

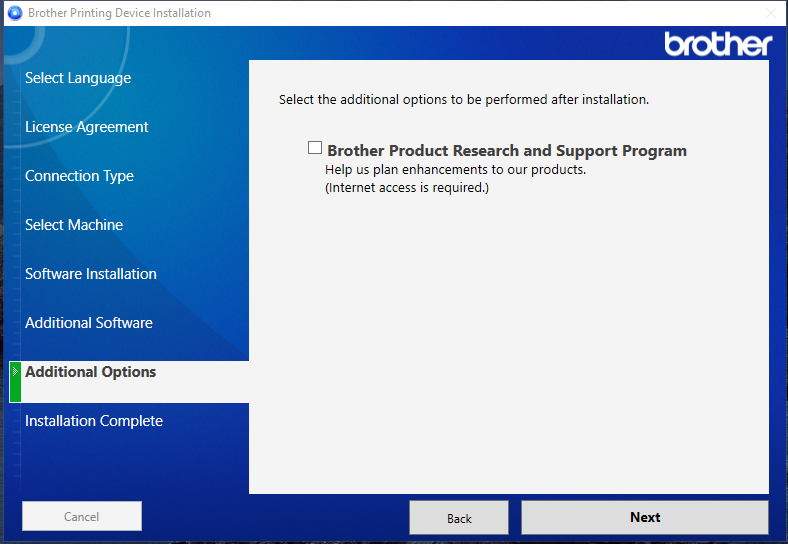
- Uncheck the support program approval

- Select Language
-
Installation finished. You’re ready to use printer over Wi-Fi.